建立记事列表
既然数据和存储的模型都准备好了,下面我们可以开始着手编写记事列表的代码了,代码如下,很简单:
id: 'notesList',
store: 'NotesStore',
itemTpl: '
<div class="list-item-title">{title}</div>
' +
'
<div class="list-item-narrative">{narrative}</div>
'
});
在noteList列表中,我们使用的是Ext中的list列表控件,其中的store属性指定了刚才建立好的NoteStore,而显示模版属性itemTpl,则分别用HTML代码设定了title和narrative两者的标签,其中都应用了如下的CSS样式:
{
float:left;
width:100%;
font-size:90%;
white-space: nowrap;
overflow: hidden;
text-overflow: ellipsis;
}
.list-item-narrative
{
float:left;
width:100%;
color:#666666;
font-size:80%;
white-space: nowrap;
overflow: hidden;
text-overflow: ellipsis;
}
.x-item-selected .list-item-title
{
color:#ffffff;
}
.x-item-selected .list-item-narrative
{
color:#ffffff;
}
现在,我们再把这个list添加到之前写好的面板中去,如下代码所示:
id: 'notesListContainer',
layout: 'fit',
html: 'This is the notes list container',
dockedItems: [NotesApp.views.notesListToolbar],
items: [NotesApp.views.notesList]
});
这里,把NotesApp.views.notesList加进items项中了。我们为了运行能看到效果,要先往数据模型中添加一条数据,如下代码:
model: 'Note',
sorters: [{
property: 'date',
direction: 'DESC'
}],
proxy: {
type: 'localstorage',
id: 'notes-app-store'
},
// TODO: 测试时用,测试后可以去除
data: [
{ id: 1, date: new Date(), title: 'Test Note', narrative: 'This is simply a test note' }
]
});
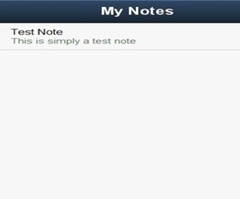
在模拟器中运行后,效果如下图:

▲模拟器运行效果图
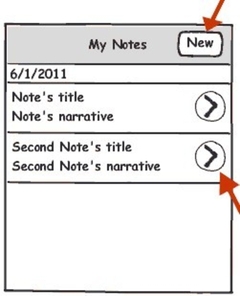
现在,我们还差两个按钮需要新增进去,一个按钮是新建记事的按钮,另外一个是记事列表中,每一条后面的查看详细情况的按钮,如下图:

▲记事按钮
下面是把“New”这个按钮增加进去的代码:
id: 'notesListToolbar',
title: 'My Notes',
layout: 'hbox',
items: [
{ xtype: 'spacer' },
{
id: 'newNoteButton',
text: 'New',
ui: 'action',
handler: function () {
// TODO: Create a blank note and make the note editor visible.
}
}
]
});
其中,注意在工具条Toolbar中,使用了hbox的布局,这样可以是这个按钮总是靠在右边,而这个按钮的处理事件,我们这里先不进行处理,等待我们把新增记事的界面完成后,再编写。
而对于记事本中每条记录后的查看详细的按钮,可以通过新增加onItemDisclosure事件去实现,代码如下:
id: 'notesList',
store: 'NotesStore',
itemTpl: '
<div class="list-item-title">{title}</div>
' +
'
<div class="list-item-narrative">{narrative}</div>
',
onItemDisclosure: function (record) {
// TODO: Render the selected note in the note editor.
}
});
在Sencha Touch的List控件中,每一行记录都有onItemDisclosure事件(具体见
http://dev.sencha.com/deploy/touch/docs/?class=Ext.List),在这个事件中,可以在获得每一条在List中被点击的记录的具体情况,并进行处理,在稍后的学习中,我们会在这个事件中编写代码进行处理,以获得被点击记录的情况,然后查看该记录的具体情况。
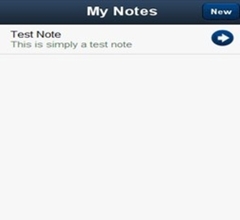
接下来我们运行代码,如下所示:

▲带按钮的运行效果图


